Instant Pot Eggnog Cheesecake is a wonderful Holiday cheesecake. It has the warm flavors of cinnamon, nutmeg, and rich eggnog. This pressure cooker eggnog cheesecake is a favorite Holiday dessert.
Eggnog Cheesecake in the Instant Pot
Eggnog anything is right up my alley. This Instant Pot Eggnog Cheesecake is so delicious and creamy, with just the right amount of spice.
Can I Use Real Rum?
- The reason I use the extract flavoring is because it is concentrated, so you don't need much. This is so we can use the ideal amount of eggnog to flavor the cheesecake.
- Real rum may not give you the best result, however, if you want to try it, dark rum, or spiced rum would be nice.
- Mix some in with the eggnog, then measure out the amount needed for the recipe.
I hope you are ready to take on the pressure cooker cheesecake! Just go in stages: Make the crust, Prepare the filling, Pressure cook the cheesecake. You can do it! I'll be here cheering you on!

Instaant Pot Pumpkin Cheesecake
Instant Pot White Chocolate Peppermint Cheesecake
Instant Pot Chocolate Cheesecake
Instant Pot Chocolate Orange Cheesecake
Instant Pot New York Cheesecake
Pressure Cooker Dreamy Orange Cheesecake

This post contains Affiliate links. As an Amazon Associate I earn from qualifying purchases.
One of the things I like to do during the Holidays is make homemade food gifts for people. It's a way of giving something special that I made myself. It's a personalized gift.
I've gifted Hot Sauce, Vanilla Extract, Chocolate Candy, Candied Pecans, and lots of other fun things!
This year I decided to gift a few people with an Instant Pot Eggnog Cheesecake. You can find bakery boxes online, and just pack in a little parchment paper, and wrap a ribbon around the box for delivery. Delicious and cute!
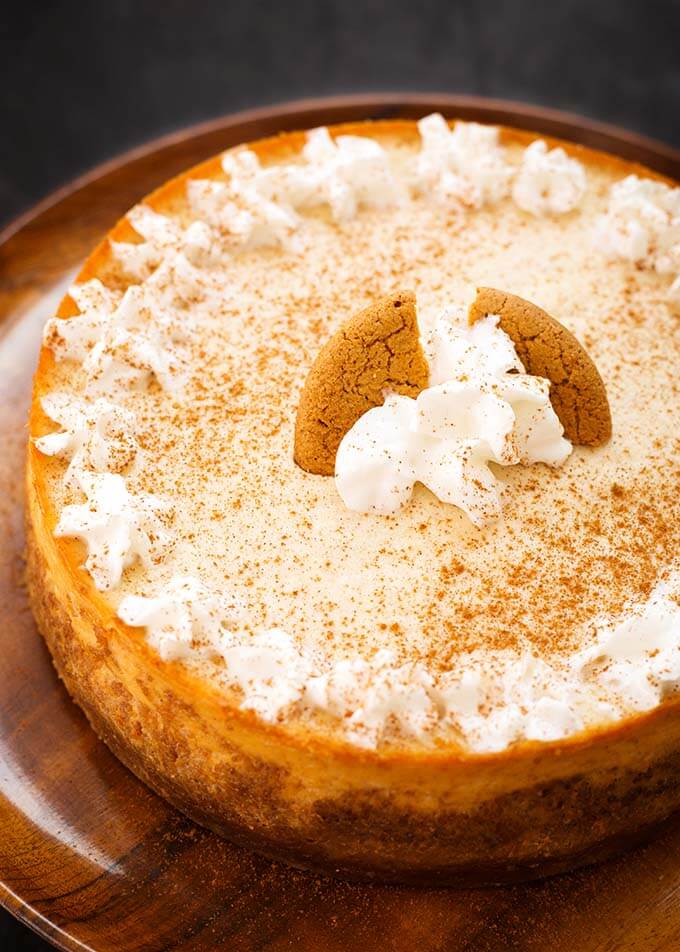
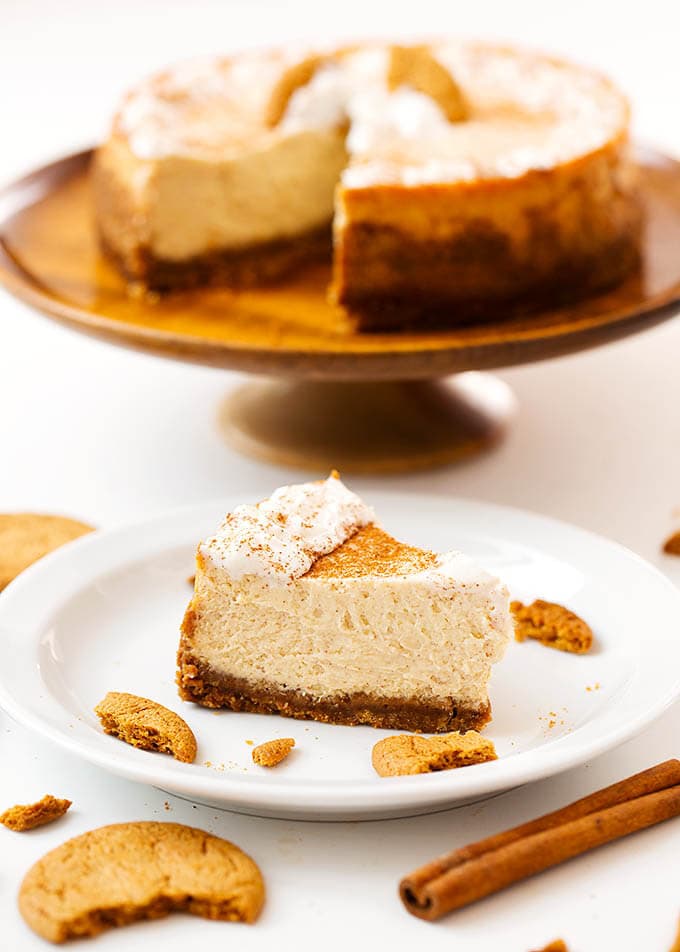
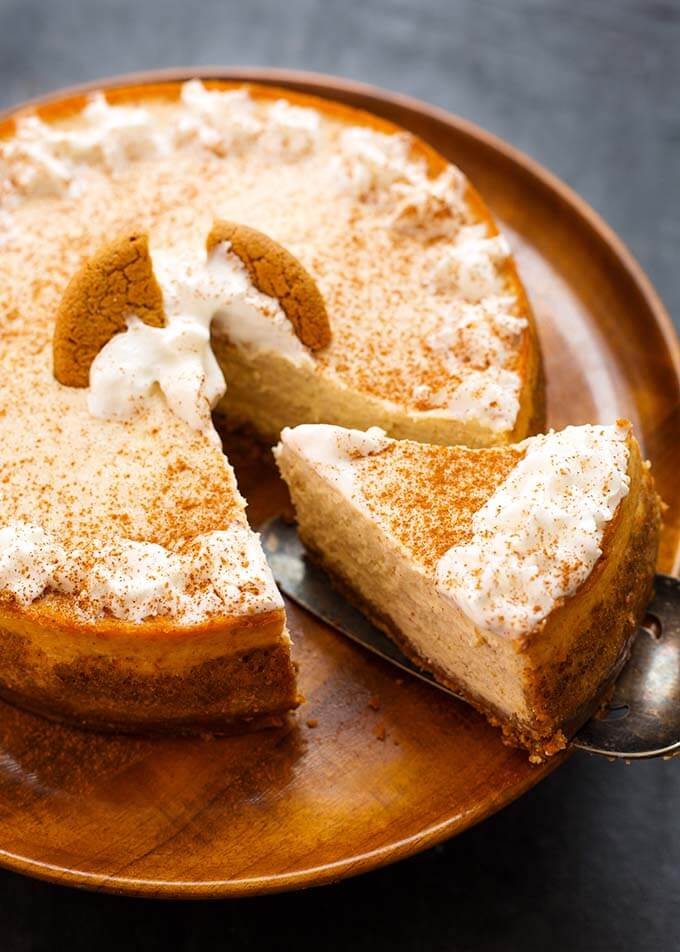
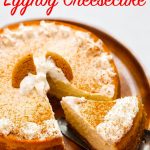
Instant Pot Eggnog Cheesecake is rich and lightly spiced with a not-too-sweet eggnog flavor. A delicious Holiday cheesecake!
- 6 Shortbread Cookies* (1 ½" squares or equivalent)
- 16 Gingersnap Cookies**
- 1 Tablespoon Sugar
- 3 Tablespoons Butter, melted
- 2 8 oz Pkgs Cream Cheese, room temp
- ½ cup Sugar
- ¾ cup Eggnog, room temp
- 1 ½ teaspoons Cornstarch
- 1 teaspoon Vanilla Extract
- ¼ to ½ teaspoon Rum Flavoring (imitation rum flavoring - found with the extracts)
- ¾ teaspoon Cinnamon
- ⅛ teaspoon Nutmeg
- 3 Eggs, room temp
-
Use a 7 inch cheesecake pan (I use a 7” Fat Daddio's Push Pan, but you can use a springform pan as well. Whatever will fit comfortably in your pressure cooker).***
-
Spray the pan with baking spray. If you have parchment paper, cut a piece to fit the bottom of your pan and spray that too (or use Worthy Parchment Liners).
-
Put 1 ½ cups of water in the inner liner of the pressure cooker.
-
Put the trivet in the pot as well.
-
Usually made with aluminum foil, used to get the cheesecake in and out of the pot easily.
-
Fold a 28” length of foil along the long end 3 times. You will end up with a sling that is 28” x 3”
-
Place the cookies and sugar into a food processor.
-
Pulse several times until the cookies turn into fine crumbs.
-
Add the melted butter and pulse several times to combine and soften the crumbs. You may need to scrape the bowl of the food processor and pulse a few more times.
-
Pour crust mixture into your prepared pan and use your fingers or the bottom of a small glass to press the mixture into place (I now use a Pastry Tamper). Cover the entire bottom of the pan and come up the sides a little. You do not have to come all the way up the sides. You want the crust to be about ¼” thick or so.
-
Put the pan in the freezer to chill and firm up while you prepare the cheesecake filling.
-
Clean the crust residue out of the food processor.
-
Add the room temperature cream cheese and sugar to food processor and process until smooth and creamy.
-
Add the eggnog, cornstarch, vanilla, rum flavoring, cinnamon, and nutmeg.
-
Pulse several times until well combined and creamy.
-
Add the room temperature eggs last. Pulse just a few short bursts until combined. If you whip the eggs too much the cheesecake will puff up and won’t have the right consistency.
-
Take the crust from the freezer and pour the filling into the pan.
-
Cover the pan with a paper towel, then with a piece of foil. Crimp the edges around the pan so it stays taut and secure.
-
Lay the sling out and set the pan on it, centered. Gather up the two ends and very carefully lift the pan and set it in the pressure cooker, leaving the sling with it. Just fold over the two ends of the sling on top of the pan.
-
Close the lid of the pressure cooker and set the steam release knob to the Sealing position.
-
Press the Manual (or Pressure Cook) button and then the +/- button to choose 37 minutes. High Pressure.
-
When cook cycle ends, let the cooker naturally release pressure for 15 minutes. Then manually release any remaining pressure.
-
When the pin drops and it is safe to open the lid, do so carefully, facing away from you.
-
Gather up the two ends of the sling and VERY carefully lift the cheesecake pan out of the cooker and onto a cooling rack.
-
Leave covered for 10 minutes, then carefully peel off the foil/paper towel.
-
Cheesecake is done when it jiggles just a little when the pan is shook. You don't want waves. It will firm up in the fridge. If it looks to liquid, cover it back up and cook for another 5 minutes, and let naturally release for 15 minutes.
-
Leave on cooling rack until cool enough to put in the fridge.
-
Put the cheesecake, still in the pan, into the fridge to chill for at least 4 hours before serving. I prefer to make my cheesecake in the evening and let it cool overnight.
-
Remove from the push pan by setting the pan on top of a large can and pushing the pan straight down. The pan will slide down and the bottom with the cheesecake on it will stay atop the can. Slide cheesecake onto a serving dish.
-
Serve as is, which is very delicious, or top with whipped cream and a dusting of cinnamon.
*You can just use 34 (1 ½ inch square or equivalent) shortbread cookies if you want.
**You can just use 20 Gingersnaps if you want.
***If you use a 6 inch pan, add 5 minutes to cook time.
Adapted from Rose Bakes

MaryAnn Aquilino
I just made this; only change was using Graham crackers for the crust as the store was out of the other cookies. But no matter how hard I tried to keep the paper towel taut, I still ended up with part of it sticking to the top of the cheesecake, leaving an impression. Do I need to use the paper towel, or can I just use foil? Is there a better way to anchor the paper towel than just crimping the foil at the edges? It smells delicious, btw; can't wait until tomorrow to try it.
Sandy
You don't have to use the paper towel. Just gently dab off any extra water when it is done.
Carl
Can I use real spiced rum instead of the flavoring? Thinking of making a couple of these for a Christmas party,,,, Also, Do you know if cooking time would be different if I made them in eggbites molds?
Sandy
You can use rum. The reason I use the extract flavoring is because it is concentrated, so you don't need much. This is so we can use the ideal amount of eggnog to flavor the cheesecake. Real rum may not give you the best result, however, if you want to try it, maybe mix some in with the eggnog, then measure out the amount needed for the recipe. The cook time will decrease to about 8 minutes with a 10 minute natural release in the molds.
Jasmine
Wow, this is excellent! I cooked mine longer because they always seem to need it. It’s not super eggnoggy flavored, more like really nicely mildly spiced. I’ve never had such a smooth cheesecake! Win!
Lynne
what quantity of crumbs needed for the recipe ?
Sandy
About 1 1/4 to 1 1/2 cups.
Melinda
Turned out SO DELICIOUS. I have Celiac so I used gluten free ginger snaps and it worked out great. Very yummy eggnog flavor.?Thank you for a keeper of a recipe!
Sandy
Hi Melinda! Yay! I'm so happy that you liked it! Thank you for your review!
Tom
Any reason not to just buy a pre-made crust?
Sandy
If you can find a pre-made graham cracker crust that will fit in your pot, and hold all of the filling, then no, no reason why you shouldn't! It's a great hack if you can find one!
Jessica
Can't wait to try this. Question, high or low pressure to cook?
Sandy
High. 🙂