This post may contain affiliate links. Please read our disclosure policy.
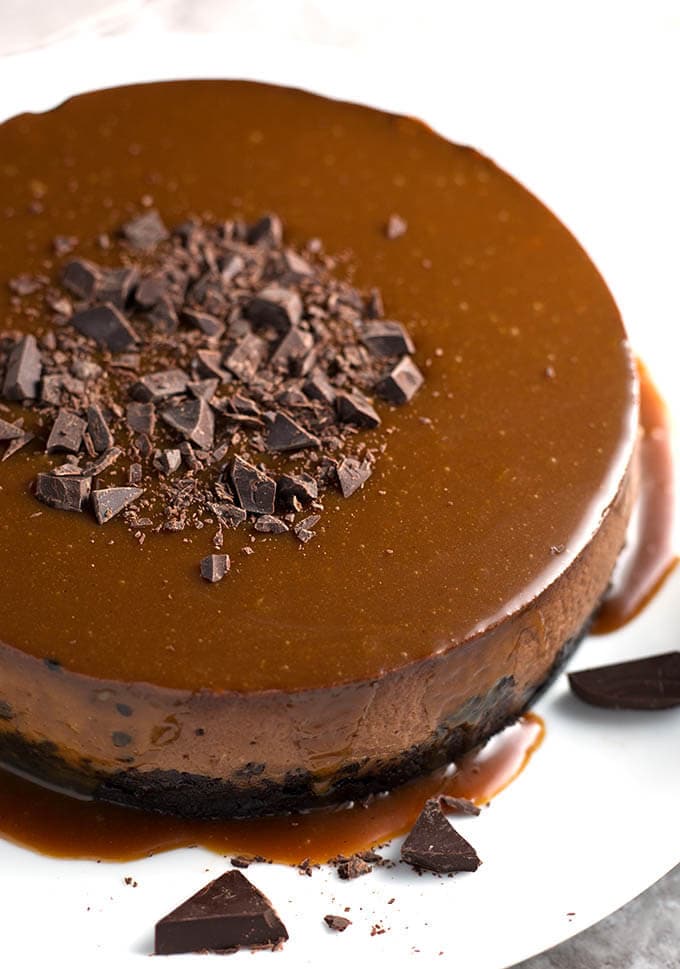
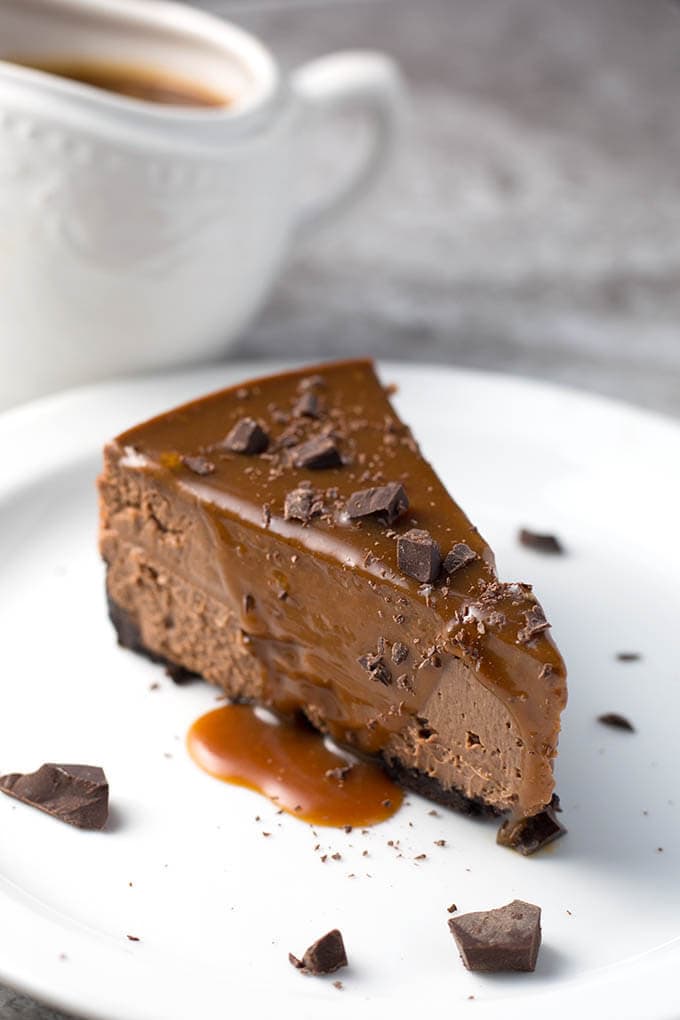
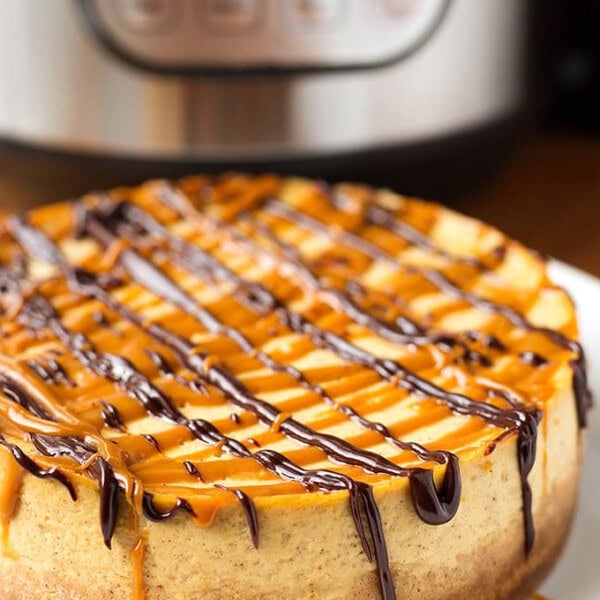
This is an amazingly creamy Instant Pot Chocolate Cheesecake that is so rich and delicious. This pressure cooker Chocolate Cheesecake is chocolatey, creamy and just so YUMMY! Chocolate cheesecake made in your pressure cooker! How cool is that?!
Instant Pot Chocolate Cheesecake
A few years ago my siblings and I did a “staycation” here in Washington. We decided to go to Seattle and stay in a hotel and just be tourists for a couple of days.
Now, when I say siblings, I mean in-law siblings, and there are 14 of us! Paul is the youngest of seven! So with the spouses, we number fourteen! Oh, and I’m the youngest. Just thought I’d mention that (hee hee, I know they will be reading this).
We get together often, and always have a great time together. We do all kinds of things, and it is very special. We don’t fight, and there is always something to talk about!
So during our Seattle staycation we ended up at a local chocolate factory! How cool is that?! We got to go on a guided tour and learned all about the chocolate, from where and how it’s grown, harvested, processed, to the final tasty products.
The name of this chocolate company is Theo Chocolate. “Theo” is from the actual name of the tree Theobroma Cacao. This is a special company, and they are organic, Fair Trade, and just so great! I have always loved their chocolate, and it makes a difference in so many people’s lives. Visit their website to learn a lot at theochocolate.com!
The tour is so fun, and you get to sample the chocolate. I couldn’t believe how much I learned about not only chocolate, but the people involved in the whole process. It’s really a great story!
I mention Theo because that is what I used in my Instant Pot Chocolate Cheesecake! I just chopped up the bars and measured a cup. I mixed 85% dark chocolate with the 45% milk chocolate. You can just use chocolate chips, or whatever chocolate you love!
I want to say that Theo is not paying me to say all of this about them, in fact, they don’t even know I wrote this post. I just love them and am proud to have a company like theirs in Seattle!
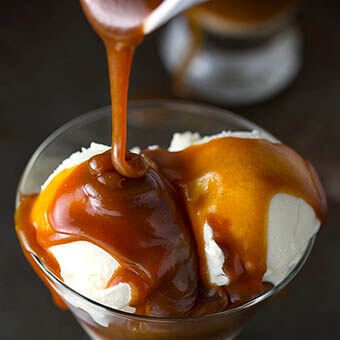
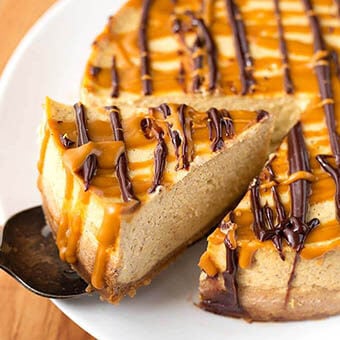
Try my Caramel Sauce, you won’t regret it!
If you love cheesecake, try my other scrumptious recipes:
Instant Pot Pumpkin Cheesecake
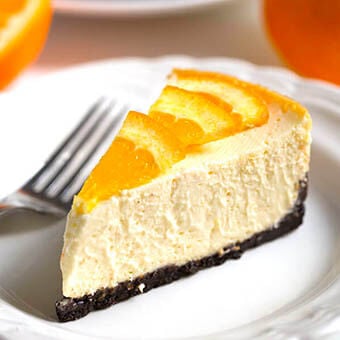
Pressure Cooker Dreamy Orange Cheesecake
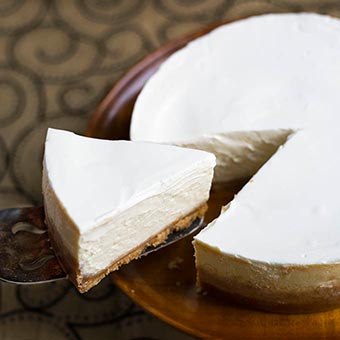
Instant Pot New York Cheesecake

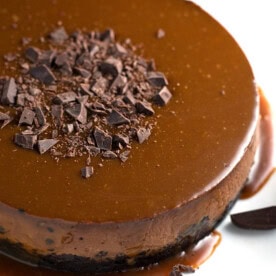
Instant Pot Chocolate Cheesecake
Ingredients
Chocolate Crust
- 20 Chocolate Sandwich Cookies (scrape filling out so you have a total of 40 discs)
- 1 Tbsp Sugar
- 3 Tbsp Butter, melted
Cheesecake Filling
- 2 8oz Pkgs of Cream Cheese, room temperature
- ½ cup Sugar
- 1 tsp Vanilla
- 1 cup Chocolate Chips, semi sweet (or mix semi sweet and dark chocolate)
- ½ cup Heavy Cream, room temperature
- ½ tsp Instant Espresso Powder (you can do without, but it enhances the chocolate flavor!)
- 1 Tbsp Unsweetened Cocoa Powder
- 2 Eggs, room temperature
Instructions
Prepare the Pan
- Use a 7 or 8 inch cheesecake pan (I use a 7” push pan, but you can use a springform pan as well. Whatever will fit comfortably in your pressure cooker and hold all of the filling).
- Spray the pan with baking spray. If you have parchment paper, cut a piece to fit the bottom of your pan and spray that too.
Prepare the Pressure Cooker
- Put 1 1/2 cups of water in the inner liner of the pressure cooker.
- Put the trivet/rack in the pot as well.
Prepare a Sling
- Usually made with aluminum foil, used to get the cheesecake in and out of the pot easily.
- Fold a 28” length of foil along the long end 3 times. You will end up with a sling that is 28” x 3”
Prepare the Crust
- Scrape the filling out of the cookies and place them in a food processor. Discard the filling.
- Add 1 Tbsp sugar.
- Pulse several times until the cookies turn into fine crumbs.
- Add the melted butter and pulse several times to combine and soften the crumbs. You may need to scrape the bowl of the food processor and pulse a few more times.
- Pour crust mixture into your prepared pan and use your fingers or the bottom of a small glass to press the mixture into place. Cover the entire bottom of the pan and come up the sides a little. You do not have to come all the way up the sides. You want the crust to be about 1/4” thick or so.
- Put the pan in the freezer to chill and firm up while you prepare the cheesecake filling.
Prepare the Cheesecake Filling
- Clean the crust residue out of the food processor.
- Add the cream cheese, sugar, and vanilla and pulse a several times until well combined. Then process until it's smooth and creamy.
- In a microwave safe bowl, add the chocolate chips and heavy cream. Heat for 25 seconds in microwave. Stir well and put back in for another 25 seconds. Stir very well again. It may take a couple minutes of stirring to become creamy, which is what you want.Let it cool to luke-warm, then stir in the espresso powder and add it to the cream cheese mixture.
- Add the cocoa powder to the cream cheese mixture and pulse a few times to combine. Then process until smooth and creamy.
- Add the eggs last. Pulse just until combined. If you whip the eggs too much the cheesecake will puff up and won’t have the right consistency.
- Take the crust from the freezer and pour the filling into the pan.
- Cover the pan with a paper towel, then with a piece of foil. Crimp the edges around the pan so it stays taut and secure.
- Lay the sling out and set the pan on it, centered. Gather up the two ends and very carefully lift the pan and set it in the pressure cooker, leaving the sling with it. Just fold over the two ends of the sling on top of the pan.
Cook the Cheesecake
- Close the lid of the pressure cooker and set the steam vent to the Sealing position.
- Press the Manual (or Pressure Cook) button and then the + or - button to choose 40 minutes. High pressure.
- When cook cycle ends, let the cooker naturally release pressure for 20 minutes. Then manually release the remaining pressure.
- When the pin drops and it is safe to open the lid, do so carefully, facing away from you.
- Gather up the two ends of the sling and VERY carefully lift the cheesecake pan out of the cooker and onto a cooling rack.
- Leave covered for a few minutes, then carefully peel off the foil/paper towel.
- Let cool for an hour, then put the pan in the fridge to chill for at least 4 hours before serving. I prefer to make my cheesecake in the evening and let it cool overnight.
Topping - Optional
- Top with extra chocolate, caramel sauce, whipped cream, strawberries or other fruit, or a sweet sour cream topping (Cheesecake in photos has my Caramel Sauce poured over it. Very good!).
Notes
Nutrition
Nutrition information is automatically calculated, so should only be used as an approximation.


I just made this cheesecake, and it was a breeze, thanks to your recipe. And DELICIOUS too! I made it in a 6″ springform pan without changing anything except not putting all the mixture in the one pan for obvious reasons. Perfect recipe as is. Thank you!
I love chocolate cheesecake and this is one of the best! Your recipe arrived in my inbox the day before my birthday and I love chocolate cheesecake for my birthday cake. It is not always easy to find a good one at a bakery or grocery store, so I usually end up making my own. I had most of the ingredients, so decided I was having chocolate cheesecake for my birthday. It turned out super. I used reduced fat cream cheese, chocolate baking bars (as I had no chocolate chips) and PureCane sugar substitute (because my husband is diabetic). In spite of all the substitutions, it still turned out GREAT!!! Thank you so much for sending this at just the perfect time!!!
I’ve made this cheesecake just as printed several times and have received rave reviews each time. It’s simple and delicious! We made a strawberry/raspberry compote to put over and wow! I do cut small slices because it’s so rich (as cheesecake always is) so it serves quite a few more than 8 at my house. Thank you for this delicious, impressive, go-to dessert!
I made this for the first time this weekend for our Easter Dessert. I followed the recipe exactly (I loved the detail in all the steps) and it turned out perfectly! Thank you for a well written recipe and a delicious cheese cake! I used the Fat Daddio 7 inch push pan. I’m adding this to my cheesecake collection! Thank you!
I just want to say that I have made this three times so far and it always gets raves. I use Nabisco Famous Chocolate Wafers for the crust so I don’t have to scrape out Oreo filling (my husband would gladly eat all the scraped out Oreo cream if I let him, and he doesn’t need the calories :)). I like a thick crust so I use 40 Famous wafers, a quarter cup of butter, and the 3 T of sugar called for. My tip is to melt the cream and chocolate chips first, before I even make the crust, because the melted chips stay really hot and take a while to cool down to lukewarm. Sometimes the cheesecake is done in 40 minutes and sometimes it it still jiggly in the middle and has to go back into the Instant Pot for 3 minutes. ( In that case, I give it a 10 minute release time before I open the valve.) I use a Fat Daddio 7” push pan, with a parchment circle in the bottom and sprayed with Pam, and I use a thin-edged fish turner spatula to lift it off the pan bottom when it’s time to serve. I store it in an upside down disposable Rubbermaid serving bowl (Walmart).
I just pulled off the foil from the cheesecake and the majority of the cheesecake isn’t cooked – looks like wet pudding. I used a 7 inch pan in a 6 qt IP. I put it back in for another 20 minutes. Super Disappointed!!
Oh no! I don’t know what to tell you. I have made this so many times and it always turns out. If it was a little jiggly when you took it out, that is normal. It firms up as it cools. Did you let it naturally release the full amount of time? Are you at a high altitude? These are things that can affect the results in pressure cooking.
Made this today for my daughter’s birthday. I found 40 minutes just slightly too short a cook time (was just a little runny in the centre. I will go next time to 42 minutes and see if that helps. We are at 3500ft altitude, which might have some effect. I added a chocolate ganache to the top. Rather than using cookies I bought a bag of baking chocolate crumbs (same section as graham crumbs in the baking aisle) and used 1 cup of crumbs. I did find with this change the crust called for way too much butter, it was dripping out the bottom of the pan. Next time I’d use half or a third as much, just enough to bind. This was a very sweet and creamy cake, great texture for the most part, maybe a touch too sweet for my taste but was a hit at the party. Thanks for the recipe! It won’t let me rate the recipe, but I’d give it 4 stars!
Hi, I’m glad you liked it. at 3500 feet altitude you would want to add about 5% to the cook time. I think 1 1/4 to 1 1/2 cups of crumbs would be better, and do freeze it first if you didn’t last time. You could also blind bake it in a 350° oven for 7-10 minutes. That will help it stay crisp. Thank you for your review!
Going to try this today! However, at the top of the recipe it says cook time is 35 minutes but the instructions say 40 minutes? I have a 7 inch pan. Please advise? Thanks!
It’s 40, sorry. I’ll fix that.
Do you think you could stack two small springform pans in there and make two at once? Maybe with a rack between? Delicious by the way!!
As long as they both fit!