This post may contain affiliate links. Please read our disclosure policy.
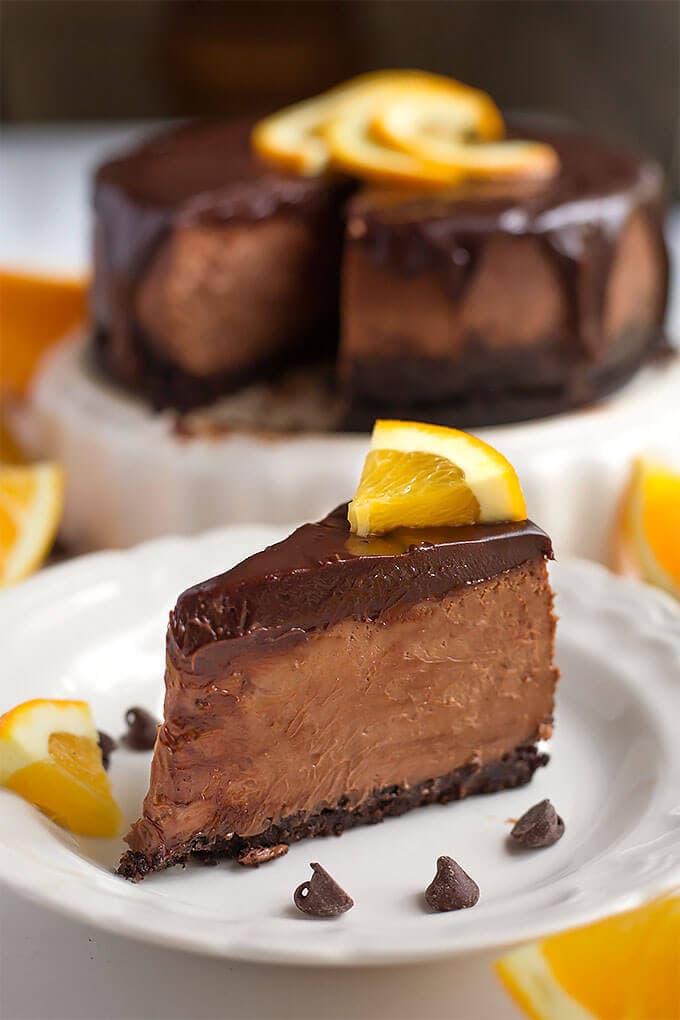
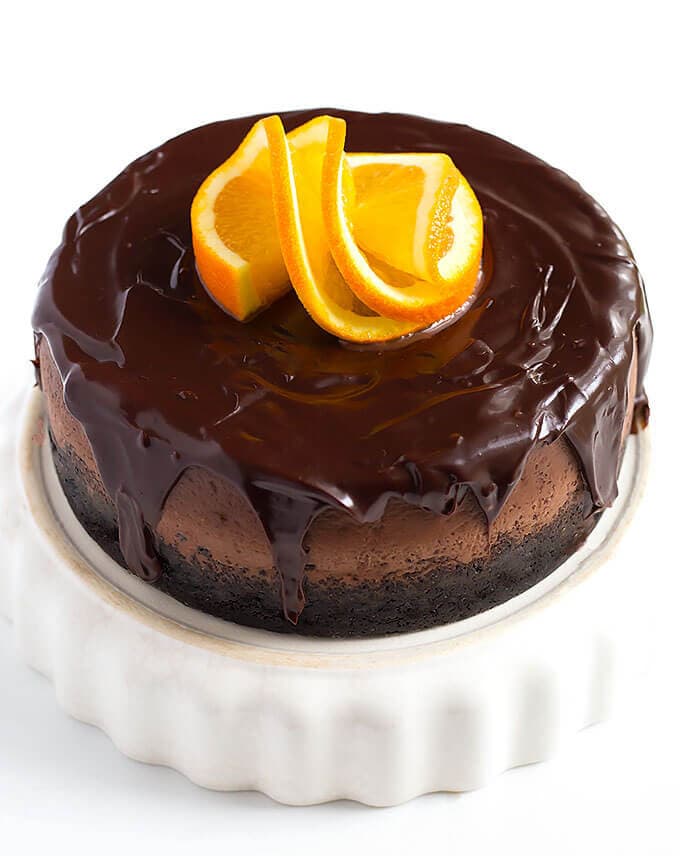
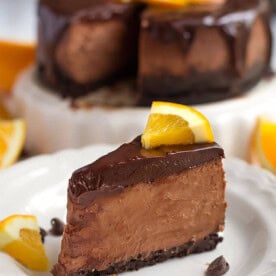
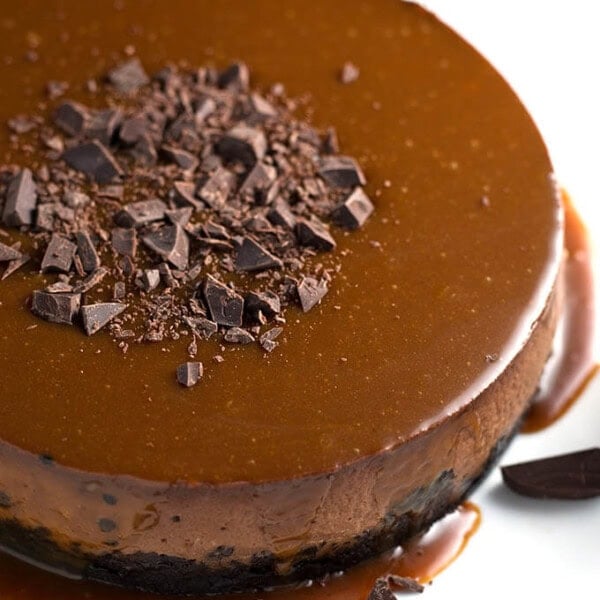
Instant Pot Chocolate Orange Cheesecake is the cheesecake of my dreams! Creamy, with rich chocolate and the hint of orange, is just delicious! Make this pressure cooker chocolate orange cheesecake for your next Holiday party, or just for the fun of it! Instant Pot cheesecake is the best!
Instant Pot Cheesecake Recipe
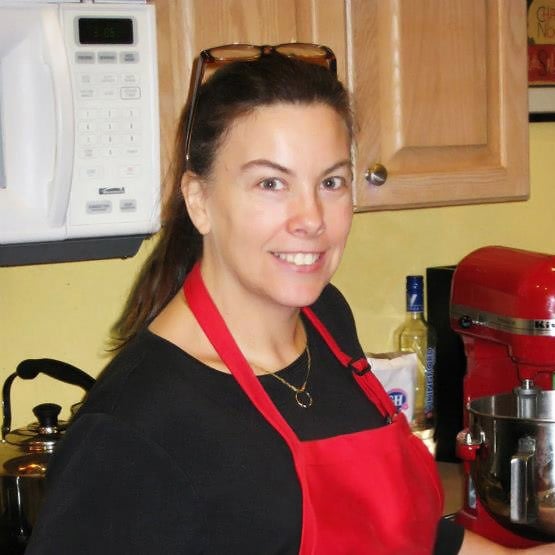
It was time. It had to happen. I’ve been thinking about this cheesecake and how it would taste for a long time. I finally got it just the way I’d hoped. So now I will share with you my recipe for Instant Pot Chocolate Orange Cheesecake! This is a rich, creamy, chocolatey, orangey amazing cheesecake!
Since the Holidays are coming up really fast, I’m trying to get some of my favorite desserts on the blog. So many cheesecakes! This Instant Pot Chocolate Cheesecake with orange is just AMAZING and so decadent!
If you take this InstaPot Chocolate Orange Cheesecake to one of your Holiday soirees, you will be complimented over and over again. Your friends will be really blown away that you made this. In your Instant Pot!! Not that you would bring a dessert like this just for the praise, but it doesn’t hurt!
I always thought Paul didn’t like the chocolate-orange combination, but I was wrong. He was anxiously waiting for the cheesecake to chill so he could be a taste tester! Needless to say, he liked it. A lot! I hope you try this Instant Pot Chocolate Orange Cheesecake, it is amazing!
You Might Also Like
Pressure Cooker Dreamy Orange Cheesecake
Instant Pot Pumpkin Cheesecake
Instant Pot White Chocolate Peppermint Cheesecake
Instant Pot Eggnog Cheesecake Story

Instant Pot Chocolate Orange Cheesecake
Ingredients
Chocolate Crust
- 20 Chocolate Sandwich Cookies (filling scraped out so you have 40 halves)
- 1 Tablespoon Sugar
- ½ teaspoon Orange Zest, grated
- 3 Tablespoons Butter, melted
Cheesecake Filling
- 2 8 oz Pkgs Cream Cheese, room temp
- ½ cup Plus 1 Tbsp Sugar
- 2 teaspoons Vanilla
- 2 ½ teaspoons Orange Zest, grated
- 2 Tablespoons Orange Juice
- 1 teaspoon Lemon Juice
- 1 cup Chocolate Chips, semi sweet (or mix semi sweet and dark chocolate)
- ½ cup Heavy Cream, room temp
- ½ teaspoon Instant Espresso Powder (you can do without, but it enhances the chocolate flavor!)
- ½ cup Sour Cream
- 1 Tablespoon Unsweetened Cocoa Powder
- 2 teaspoons Corn Starch
- 3 Eggs, room temp
Chocolate Ganache Topping (Optional)
- ½ cup Chocolate Chips, semi sweet
- ⅓ cup Heavy Cream
Instructions
Prepare the Pan
- Use a 7 or 8 inch cheesecake pan (I use a 7” Fat Daddio's push pan, but you can use a springform pan as well. Whatever will fit comfortably in your pressure cooker and hold all of the filling).
- Spray the pan with baking spray. If you have parchment paper, cut a piece to fit the bottom of your pan and spray that too (I use Worthy Parchment Precut liners).
Prepare the Pressure Cooker
- Put 1 1/2 cups of water in the inner liner of the pressure cooker.
- Put the trivet in the pot as well.
Prepare a Sling
- Usually made with aluminum foil, used to get the cheesecake in and out of the pot easily.
- Fold a 28” length of foil along the long end 3 times. You will end up with a sling that is 28” x 3”
Prepare the Crust
- Scrape the filling out of the cookies and place them in a food processor. Discard the filling (I don't like using the filling as it makes the crust greasy).
- Add 1 Tbsp sugar and orange zest.
- Pulse several times until the cookies turn into fine crumbs.
- Add the melted butter and pulse several times to combine and soften the crumbs. You may need to scrape the bowl of the food processor and pulse a few more times.
- Pour crust mixture into your prepared pan and use your fingers or the bottom of a small glass (or a wood tamper) to press the mixture into place. Cover the entire bottom of the pan and come up the sides a little. You do not have to come all the way up the sides. You want the crust to be about 1/4” thick or so.
- Put the pan in the freezer to chill and firm up while you prepare the cheesecake filling.
Prepare the Cheesecake Filling
- Clean the crust residue out of the food processor.
- Add the cream cheese, sugar, and vanilla and process until smooth and creamy.
- Add the orange zest, orange juice, lemon juice.
- Pulse a several times until well combined.
- In a microwave safe bowl, add the chocolate chips and heavy cream. Heat for 25 seconds in microwave. Stir very well and put back in for another 25 seconds. Stir very well again. It may take a couple minutes of stirring to become creamy, which is what you want.Let it cool to luke-warm, then stir in the espresso powder and sour cream (which helps cool it), and add it to the cream cheese mixture.
- Add the cocoa powder and corn starch. Pulse several times to combine. Then process for a minute to make it smooth and creamy.
- Add the eggs last. Pulse just until combined. If you whip the eggs too much the cheesecake will puff up and won’t have the right consistency.
- Take the crust from the freezer and pour the filling into the pan.
- Cover the pan with a paper towel, then with a piece of foil. Crimp the edges around the pan so it stays taut and secure.
- Lay the sling out and set the pan on it, centered. Gather up the two ends and very carefully lift the pan and set it in the pressure cooker, leaving the sling with it. Just fold over the two ends of the sling on top of the pan.
Cook the Cheesecake
- Close the lid of the pressure cooker and set the steam vent to the Sealing position.
- Press the Manual (or Pressure Cook) button/dial and then the +/ - button to choose 43 minutes.
- When cook cycle ends, let the cooker naturally release pressure until the pin in the lid drops down. Then turn off the pot and open the lid, but let the cheesecake sit in the pot for another 10 minutes. Cooling it slowly helps eliminate cracks.
- Gather up the two ends of the sling and VERY carefully lift the cheesecake pan out of the cooker and onto a cooling rack.
- Leave covered for 10 minutes, then carefully peel off the foil/paper towel and check for doneness.
- Cheesecake is done when it jiggles a little when the pan is shook. You don't want waves, but it should jiggle a little. It will firm up in the fridge. If it looks too loose, cover it back up and cook for another 5 minutes, and let naturally release for 15 minutes.
- Let cool for an hour, then put the pan in the fridge to chill for at least 4 hours before serving. I prefer to make my cheesecake in the evening and let it cool overnight.
Chocolate Ganache Topping (Optional)
- In a microwave safe bowl, add the chocolate chips and heavy cream. Heat for 25 seconds in microwave. Stir very well and put back in for another 25 seconds. Stir very well again. It may take a couple minutes of stirring to become creamy and glossy.
- Pour over the cooled cheesecake and let set up in the refrigerator.
Nutrition
Nutrition information is automatically calculated, so should only be used as an approximation.


Made this, so incredibly delicious and easy to put together. I had some extra filling, I think next time I’ll 1/2 the filling and see what happens. 😁
Thank you for sharing!
This is the most amazing cheesecake I have ever tasted!