Instant Pot Chili is a great meal. The perfect dinner to serve the whole family. I often serve a warm bowl of Chili on a cold day for a comforting meal, or bring a pot of chili to the potluck. This is a great Game Day recipe, or even for a party. This pressure cooker Chili recipe cooks in a fraction of the time as on the stove top. Once you make delicious Chili in the Instant Pot, I think you’ll agree that is is very good!
Originally Published on 10/27/17
Instant Pot Chili
Who doesn't love to be served a big bowl of Chili served with lots of fixings?
This is the best Instant Pot Chili recipe, rich and delicious with plenty of meat and beans. One of my all-time favorite Instant Pot recipes! When you make this pressure cooker chili, be ready for some compliments!
Chili is a great recipe to feed a group of people. I’m known for it in our circle of friends and family. This chili has been to almost every party and gathering we’ve had in the past 20 years!
This is a chili recipe that I used to make on the stovetop, and I converted it to be an Instant Pot Chili. One of my easy recipes!
Is This Instapot Chili Spicy?
Not very. I use a mild chili powder and a tiny bit of chipotle powder, which is where most of the spiciness comes from. You can spice your chili however you like. Red pepper flakes, cayenne pepper, or add a chipotle in adobo for an amazing smoky flavor and some heat.
WHICH MEAT IS BEST FOR CHILI IN THE INSTANT POT?
Usually, I make this a beef chili recipe with 90%-93% lean ground beef and use beef broth. More often nowadays I make this into a turkey chili with 85%-93% lean ground turkey or ground chicken and use chicken broth. It works fine and is delicious with either meat.
CAN I MAKE THIS an Instant Pot VEGETARIAN Chili?
• Yes you can! It is good without meat. Just omit the meat and use vegetable broth.
• You may want to increase the amount of beans to make up for the lack of volume from not having the meat.
WHICH BEANS ARE GOOD FOR CHILI?
- This meat and bean chili recipe calls for canned beans. You can use just about any variety of canned beans that you like. Be sure to rinse and drain them.
- I find that using 3 types of beans enhances the overall enjoyment of the pressure cooker chili for me. I started doing this with my baked beans, and now I do this with my chili recipe.
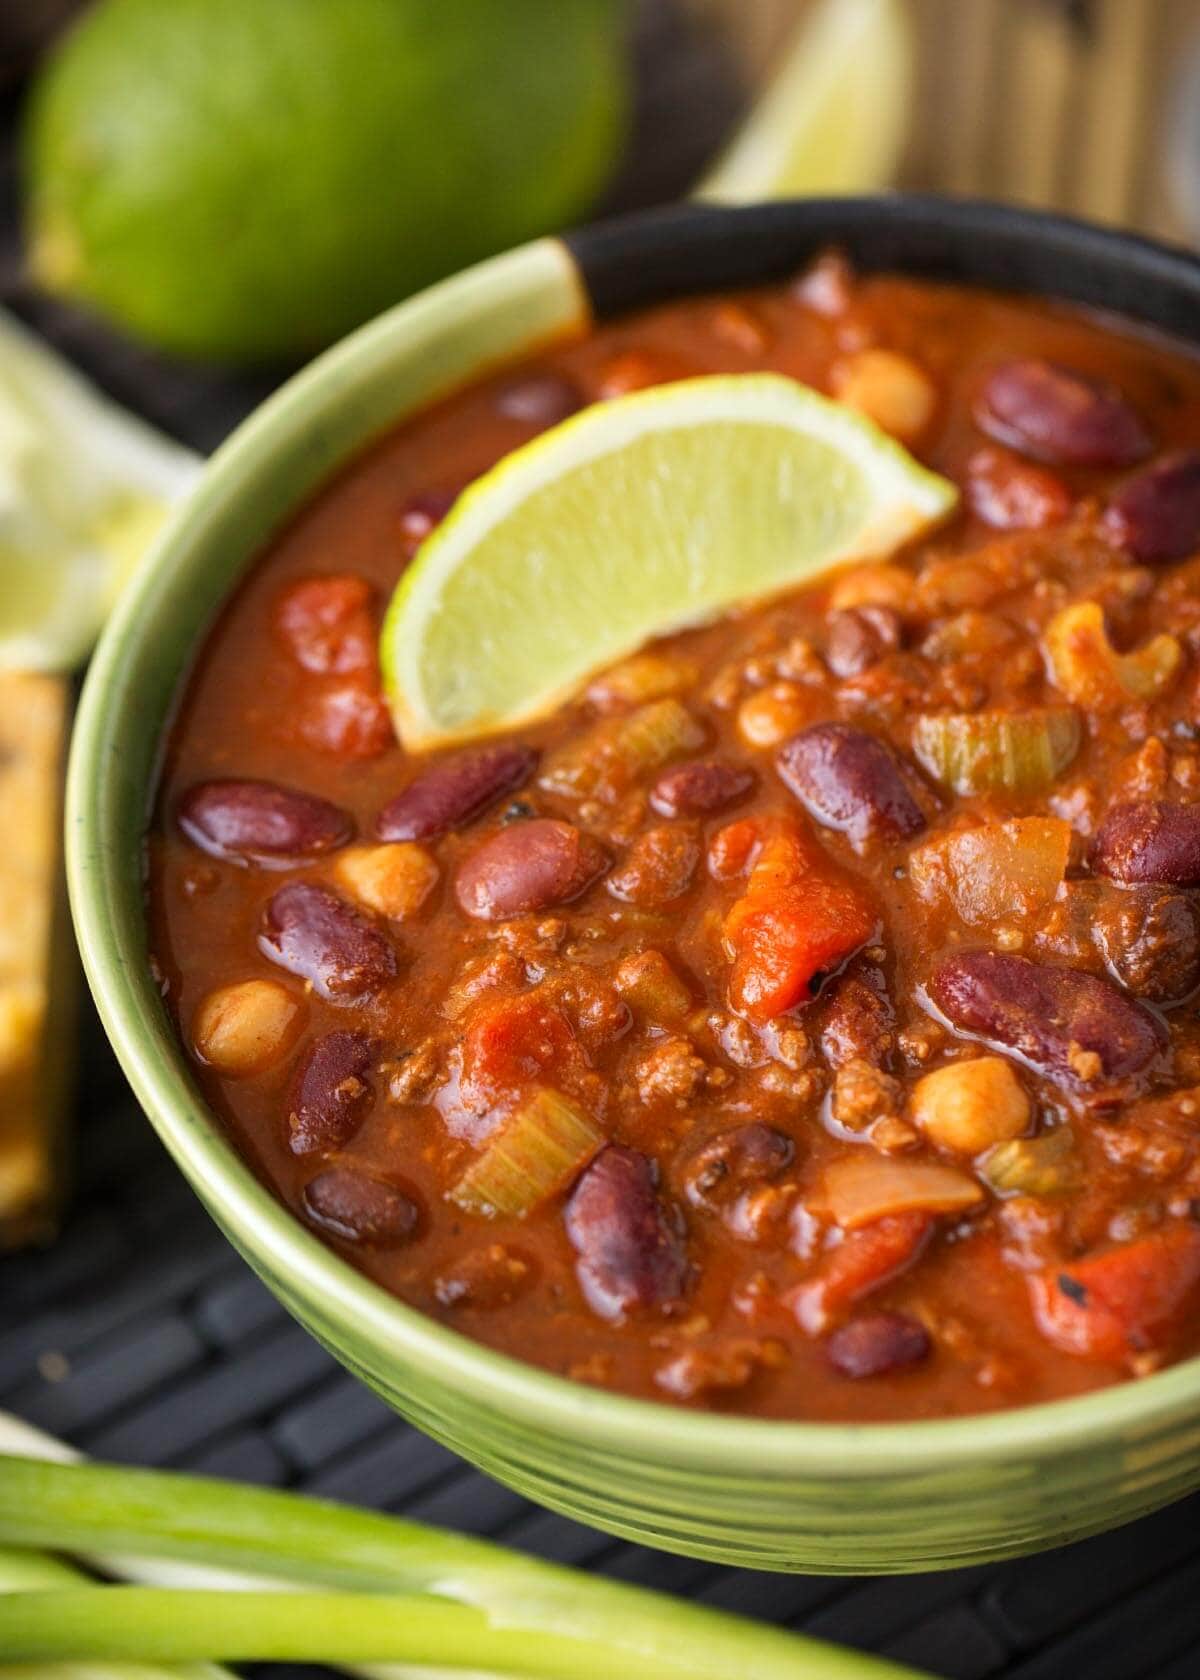
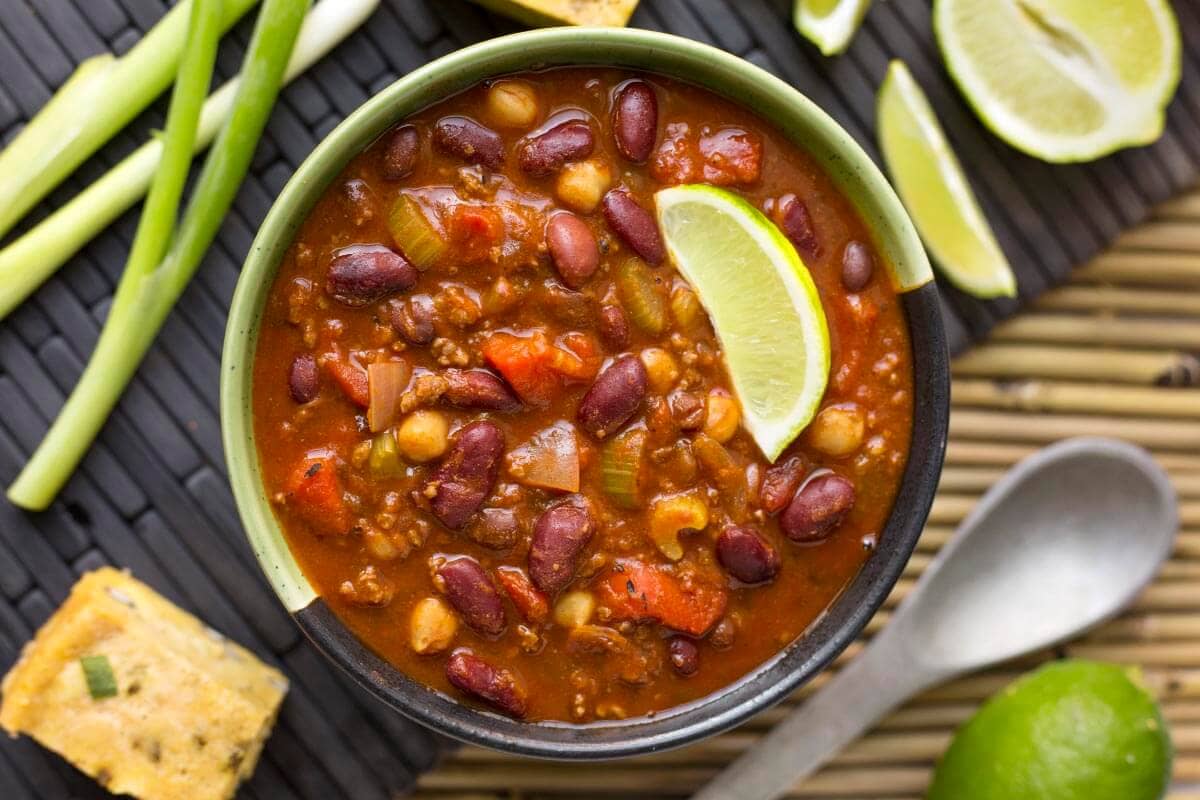
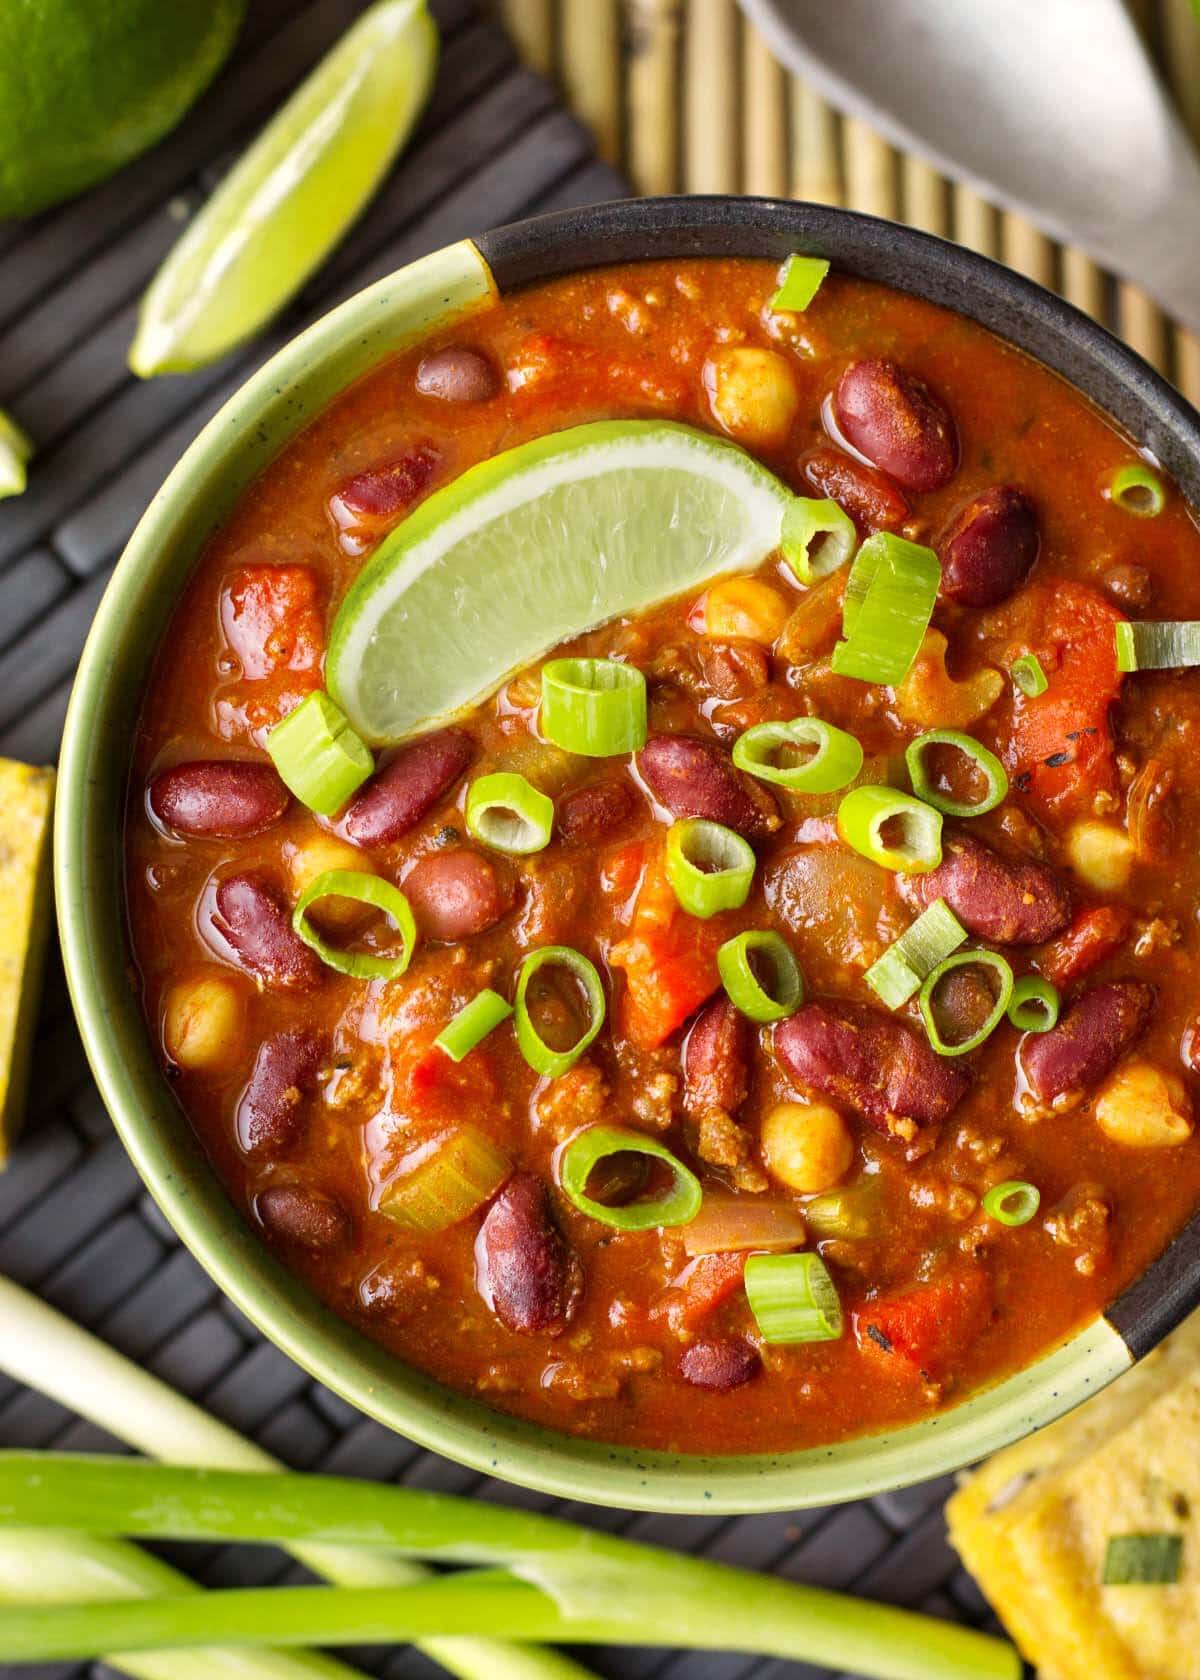
- My chosen trio of beans are black beans, red kidney beans, and garbanzo beans. You can also use canned pinto beans. It is just personal preference.
How to Avoid the Burn Notice
- I sometimes hear from people who have trouble getting a thicker pot of food, such as chili, to come to pressure. They get the dreaded BURN message, and it never pressurizes. This usually happens because there is not enough thin liquid to make the steam necessary to build the pressure.
- I always hang around my pot while cooking a thicker dish until it pressurizes, just in case. Once the pin pops up it is at pressure, the timer will start to count down after a minute or so. At that point I always feel like I'm home free and nothing will burn!
- The layering technique, and not stirring, helps keep the tomatoes from touching the bottom of the pot and burning. Tomatoes have a lot of natural sugar in them, so they burn easily.
- Also, by not stirring, the mixture doesn't get too thick. You need thin liquid to create the steam that builds the pressure.
How to Make Instant Pot Chili Recipe
- Set the Instant Pot to the Saute mode. When the display reads “Hot” add the meat. Cook, stirring occasionally, until almost done (if you use 93% lean or higher, you won't need to drain the fat. You'll need a little to cook the onions).
- If you use ground turkey, you will need a little oil.
- Add the bay leaf, onion, celery, garlic, and oregano. Cook for about 5 minutes, stirring occasionally, scraping up any browned bits from the bottom of the pot, until onion starts to turn translucent.
- Add salt, pepper, smoked paprika, cumin, chili powder, and chipotle chili powder and cocoa powder (if using). Stir well.
- Add the broth/water. Stir well.
- Cancel/turn off the Sauté function.
- Add the green chiles and roasted red pepper, if using. Do not stir.
- Add all of the rinsed & drained beans. Do not stir.
- Add the diced tomatoes. Do not stir.
- Add the tomato paste. Do not stir.
- Place the lid on the pressure cooker and lock it into place. Set the steam release knob to Sealing (if your model is not self-sealing).
- Press the Pressure Cook (or Manual) button and then the +/- button or dial to choose 5 minutes. High Pressure. If your pot has a chili setting, make sure it is around 5 to 7 minutes only.
- When the cook cycle is finished, let the pot sit undisturbed for 15 minutes (15 minute natural pressure release).
- Manually release the remaining pressure by turning the steam release knob to the Venting position. Do this in short bursts at first, releasing the steam gradually, until you can be sure that none of the sauce will spew out with the steam. Then open the vent all the way.
- Carefully give the chili a good stir, then taste it. Adjust salt and/or seasonings as desired.
- Serve with your favorite toppings and chili fixings, and maybe some cornbread!
From this point on, layer the remaining ingredients and Do Not Stir (to avoid the BURN Error).
Stay by the pot until it comes to pressure. I wanted to make this as close to my original recipe as possible, which is a thick chili. If the time starts to count down and the pot has NOT come to pressure (the pin in the lid is still down), open the pot, add in ½ cup of water, and reset the lid and cook time. You shouldn’t have to as I make it this way and it always comes to pressure, but just in case. It will take several minutes to come to pressure, but after it does, the time will appear on the display and start counting down.
Best Chili Toppings
The possibilities are endless! But here are some of my favorite Chili toppings:
A dollop of sour cream, crushed tortilla chips, hot sauce, lime juice, cheddar cheese, avocado chunks, cilantro, diced jalapeño, and chili peppers. You can get very creative!
How to Store Leftover Chili
Put in an airtight container and keep in the fridge for up to 5 days.
DOES CHILI FREEZE WELL?
Yes, chili does freeze very well. I like to freeze chili in portion sizes in airtight containers or freezer baggies. Chili will keep in the freezer for up to 5 months.

Instant Pot Drunken Beans (Frijoles Borrachos)
Instant Pot Beef Barley Vegetable Soup
Sandy's Instant Pot Beef Stew
Instant Pot Refried Beans
So get ready for some comfort food in the form of Instant Pot Chili! Serve this up on Game Day and feed a crowd. Bring this to your next potluck and you will be asked for the recipe!
If you make this easy Chili recipe in the Instant Pot, please let me know. Just leave a comment with a star rating below. I’d like to know how it worked for you!


My original recipe for my famous chili adapted for the Instant Pot electric pressure cooker. This is a thick, delicious chili.
- 2 lbs Lean Ground Beef (or 93% Lean Ground Turkey. Use a little olive oil to brown the turkey)
- 1 Bay Leaf
- 1 large Onion, chopped
- 1 cup Diced Celery,
- 5 cloves Garlic, minced or pressed
- 2 teaspoons Mexican Oregano (or regular oregano)
- ¼ teaspoon Black Pepper
- 1 ¼ teaspoons Kosher Salt (or 1 tsp table salt) or to taste
- 2 teaspoons Smoked Paprika, optional
- 2 Tablespoons Ground Cumin
- 3 Tablespoons Chili Powder, mild
- 1 Tablespoon Unsweetened Cocoa Powder, optional
- ¼ teaspoon Chipotle Chili Powder, optional (adds the heat and extra flavor. Use more for a spicier chili) or use cayenne pepper
- 2 cups Low Sodium Chicken Broth or Water (or LS beef broth. I like the flavor of chicken).
- (1) 7 oz can Diced Green Chilis (with juice) optional
- 1 cup Roasted Red Bell Peppers, (chopped) optional
- (2) 15.25 oz cans Kidney Beans, rinsed and drained
- (1) 15 oz can Black Beans, rinsed and drained
- (1) 15.5 oz can Garbanzo Beans, rinsed and drained
- (2) 14.5 oz cans Diced Tomatoes (undrained)
- (2) 6 oz cans Tomato Paste
-
Set the Instant Pot to the Sauté setting. When the display reads “Hot” add the meat. Cook, stirring occasionally, until almost done (if you use 93% lean or higher, you won't need to drain the fat. You'll need a little to cook the onions).
If you use ground turkey, you will need a little oil.
-
Add the bay leaf, onion, celery, garlic, and oregano. Cook for about 5 minutes, stirring occasionally, until onion starts to turn translucent.
-
Add salt, pepper, smoked paprika, cumin, chili powder, and chipotle chili powder. Stir well.
-
Add the broth/water. Stir well.
-
Cancel/turn off the Sauté setting.
-
Add the green chiles and roasted red pepper, if using. Do not stir.
-
Add all of the rinsed & drained beans. Do not stir.
-
Add the diced tomatoes. Do not stir.
-
Add the tomato paste. Do not stir.
-
Place the lid on the pressure cooker and lock it into place. Set the steam release knob to Sealing (if your model is not self-sealing).
-
Press the Pressure Cook (or Manual) button and then the +/- button or dial to choose 5 minutes. High Pressure.
-
Stay by the pot until it comes to pressure. I wanted to make this as close to my original recipe as possible, which is a thick chili. If the time starts to count down and the pot has NOT come to pressure (the pin in the lid is still down), open the pot, add in ½ cup of water, and reset the lid and cook time. You shouldn’t have to as I make it this way and it always comes to pressure, but just in case. It will take several minutes to come to pressure, but after it does, the time will appear on the display and start counting down.***
-
When the cook cycle is finished, let the pot sit and naturally release pressure for 15 minutes.
-
Manually release the remaining pressure by turning the steam release knob to the Venting position. Do this in short bursts at first, releasing the steam gradually, until you can be sure that none of the sauce will spew out with the steam. Then open the vent all the way.
-
Carefully stir the chili and then taste it. Adjust salt and/or seasonings as desired. Serve with your favorite chili fixings and maybe some cornbread!
- I hear from people who have trouble getting a thicker pot of food, such as chili, to pressure. They get the dreaded BURN message, and it never comes to pressure. ***Once the pin pops up it is at pressure, and the time will start to count down after a minute or so. At that point I always feel like I'm home free and nothing will burn! I always hang around my pot while cooking a thicker dish, just in case.
- The layering technique, and not stirring, helps keep the tomatoes from touching the bottom of the pot and burning. Tomatoes have a lot of natural sugar in them, so they burn easily.
- Also, by not stirring, the mixture doesn't get too thick. You need thin liquid to create the steam that builds the pressure.
Resources to Make Instapot Chili Recipe
This post contains Affiliate links. As an Amazon Associate I earn from qualifying purchases.


Kat
Loved this chili recipe! I will make it again and again! I had to sub a few things - I used a second can of pinto beans, as a family member does not like garbanzo beans. I found I only had one can of tomato paste, so I subbed a small can of tomato sauce for the second can of paste. Was happy to have the smoked paprika and chili powder on hand! I really appreciate all your tips and well-explained directions! I enjoy your recipes!
Diane Reynolds
How do I change the recipe for my small IP?
Sandy
Cut it in half, but keep the cook time the same.
T DeLeon
I use this recipe over and over, adjusting for personal taste. I also use this website over and over for good solid recipes. Thank you Sandy for sharing!
Sandy
I'm happy that you like my recipes! Thank you for letting me know!
George
Looks like a great recipe (again) Small family here. Can this be frozen??
Sandy
Yes, you can freeze this!
MARY BROTMAN
Your recipe for Corn Beef and Cabbage was fantastic!!! AND, my cousin's maiden is Clifton, from Baltimore, MD. You could be close cousins by your looks!! Beautiful faces!
Marci
Hi Sandy would I be able to brown the meat then dump this in the crockpot to cook all day? The only thing I’m missing is celery which I figure I can just omit
Sandy
Yes, you can do that.
Molly
I made this following the recipe except I had to sub 22 oz of ketchup for tomato paste because I only had a small 8 oz can. I think the extra liquid from the ketchup helped this cook properly! It turned out FANTASTIC. I also added a splash of hot sauce for some heat (I didn't have the hot chili powder). I have never made chili with garbanzo beans but was pleasantly surprised at the texture in the finished result I didn't have any issues with the pot pressurizing, despite it being almost full. It came out a little soupy but a slotted spoon solves that problem if you like it chunky. I added Mexican shredded cheese and made some corn muffins as a side. Will definitely make this again!
Scott
I've had the BURN code come up each of the last three times I've made chili. Are you saying that I should stick around the pot and, if it looks like it's not coming to pressure, open it and deglaze & scrape up the bottom?
Sandy
Hi Scott, yes I am. I believe different models of pots have different sensitivities. My first IPs never burn. The new one can with certain recipes. You don't always need to deglaze when you reopen, just scrape it and add a bit of liquid. There is no thick chili that works perfectly in every model of pressure cooker.