
This post may contain affiliate links. Please read our disclosure policy.
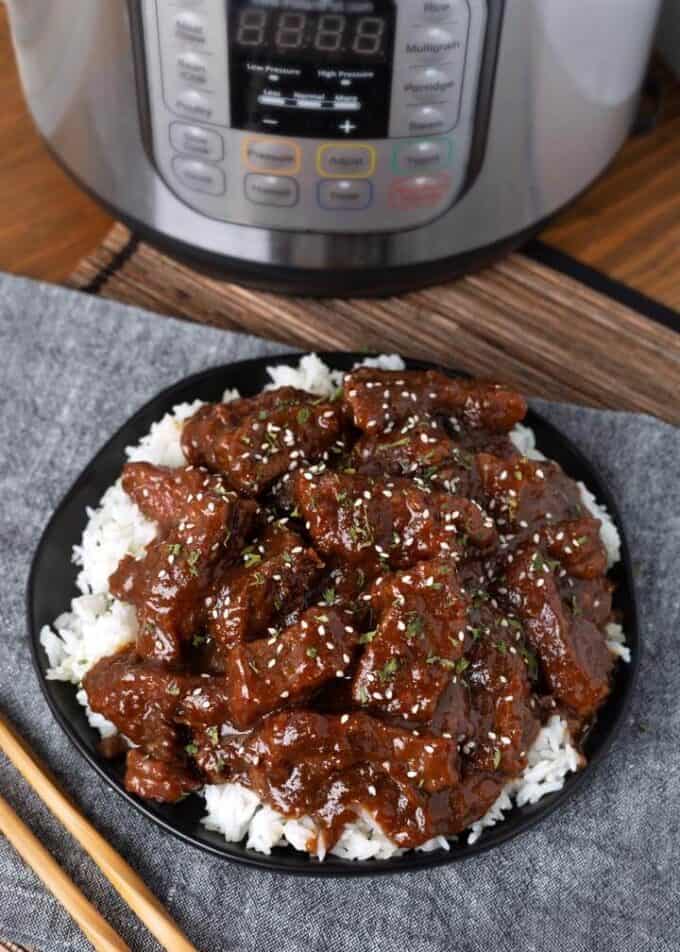
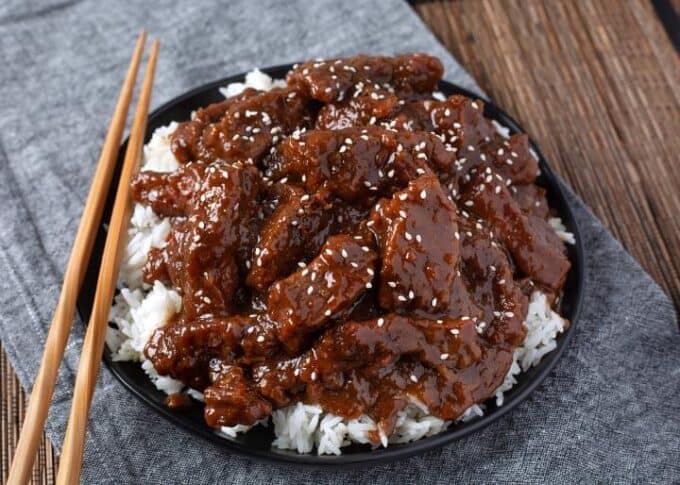
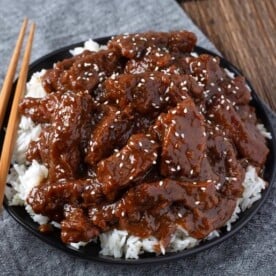
Instant Pot Mongolian Beef is a delicious dish made with flank steak and has a flavorful sauce. The beef is tender and the sauce is thick and rich, perfect to serve over rice. Pressure cooker Mongolian Beef is Chinese takeout you can have while staying in!
Instant Pot Mongolian Beef
When you are craving some Chinese takeout, and can’t get out, make some at home! Mongolian Beef is one of the easier Chinese takeout style recipes you can make.
What is Mongolian Beef?
Mongolian beef is a dish served in Chinese restaurants made from sliced beef, usually flank steak, cooked in a flavorful sauce and is most often served over rice.
The beef is not too sweet, and not too spicy. This dish is one of the most popular beef recipes I have.
Which Cut of Meat is Best for Mongolian Beef?
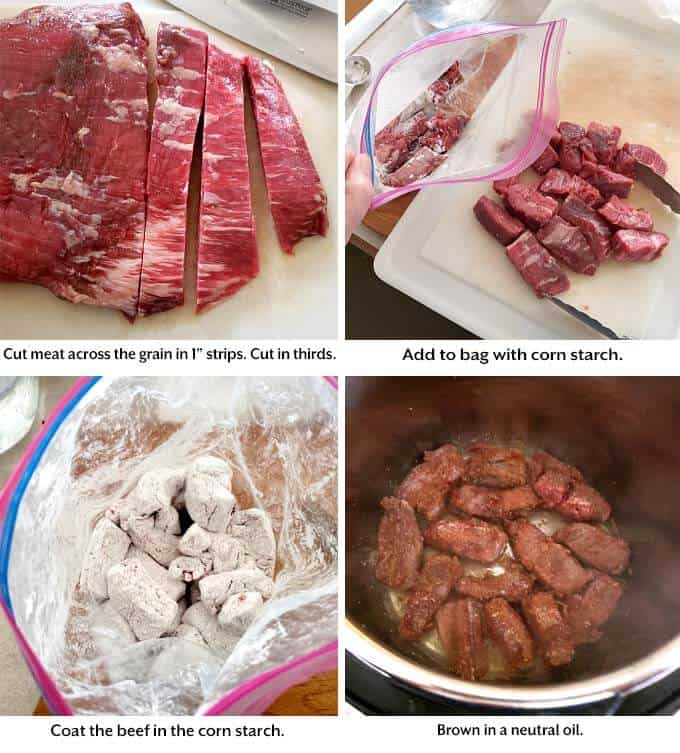
- Flank steak is the best cut of beef to use. When you cut flank steak across the grain it will cook up nice and tender, but still have a little chew to it.
- You can also use a well marbled chuck roast, cut thinly on the bias. The fat will give Mongolian Beef great flavor.
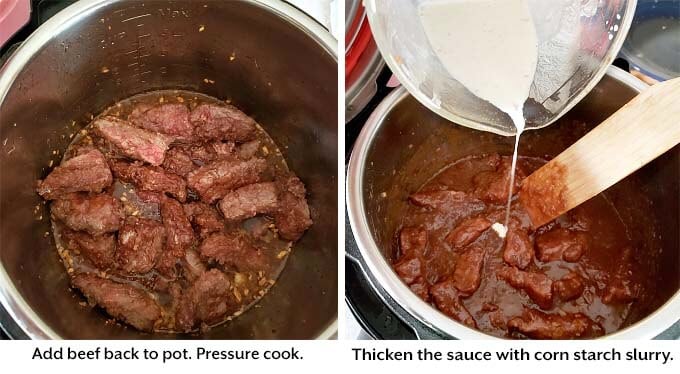
The steps to make this yummy Instant Pot Mongolian Beef recipe are so easy. Here they are:
Not pictured, but you can cook some cut green onions with the beef for some nice flavor and color.
Serve this delicious pressure cooker Mongolian Beef over some hot steamed rice for a perfect takeout meal at home!

Instant Pot Cashew Chicken
Instant Pot Korean Ground Beef
Instant Pot Egg Roll in a Bowl
Instant Pot Beef Tips
If you make this delicious pressure cooker Mongolian beef recipe, please leave a comment with a star rating below. I’d love to know how you liked it!

Instant Pot Mongolian Beef
Equipment
- 6 qt Electric Pressure Cooker
Ingredients
- 3 Tablespoons Corn Starch
- 2 lbs Flank Steak, cut across the grain in 1" wide strips
- 2 Tablespoons Cooking Oil, canola, peanut, other neutral oil
- 8 cloves Garlic, pressed
- 1 Tablespoon Ginger, minced (or 3 tsp powdered)
- ¾ cup Low Sodium Soy Sauce
- 2 Tablespoons Rice Wine (Mirin), or Rice Wine Vinegar
- 3 teaspoons Toasted Sesame Oil
- ½ teaspoon Red Pepper Flakes, (or ¼ tsp cayenne pepper)
- ¾ cup Water, divided
- 5 Green Onions, chopped in 1" pieces (not pictured)
- ¼ cup Brown Sugar
To Thicken
- 2 Tablespoons Corn Starch
- 2 Tablespoons Cold Water
Instructions
- Add the corn starch to a large plastic zip closure bag, or to a bow. Add the beef slices and coat them in the corn starch. Set them aside.
- Turn on the pressure cooker's highest Sauté setting. When it is hot, add the oil.
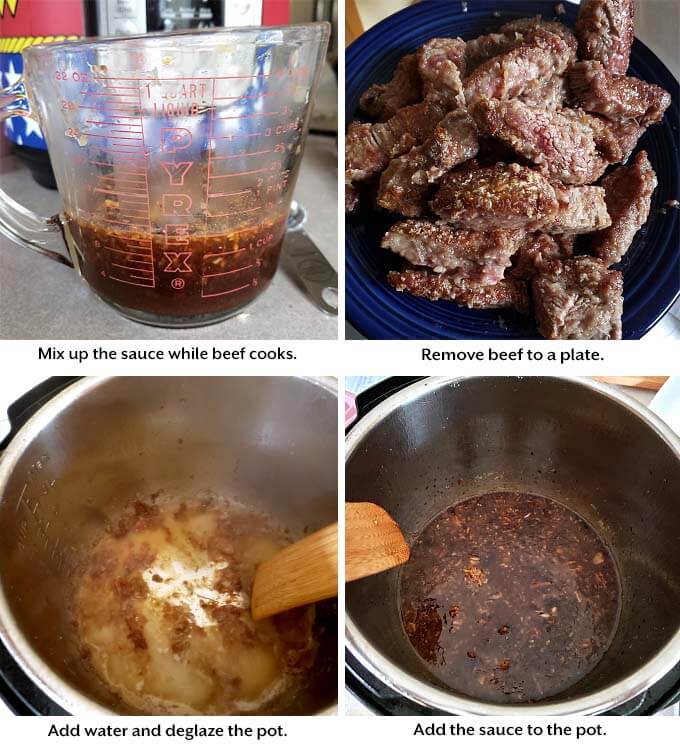
- Add the beef in one layer and brown both sides. You will need to do this in two batches so the meat isn't crowded. You are just browning the meat, it will not be fully cooked at this point. Remove to a plate and set aside.
- While the beef is browning, to a large measuring glass/cup add the garlic, ginger, soy sauce, rice wine, sesame oil, red pepper flakes, and ¼ cup of the water. Mix well. Set aside.
- Add remaining ½ cup of water to the pot and use a wooden spoon to scrape up all of the browned bits from the bottom of the pot (deglaze).
- Add the sauce and green onions to the pot and stir.
- Cancel the sauté setting and add the beef and any liquid on the plate back into the pot.
- Close the lid and set the steam release knob to the Sealing position.
- Press the Pressure Cook/Manual button or dial, then the +/- button or dial to select 10 minutes. High Pressure. The pot will take a few minutes to come to pressure.
- While the beef is cooking, mix together the corn starch and water for thickening. Set aside.
- When the cook cycle has finished, turn off the pot and let it sit undisturbed for 10 minutes (10 minute natural release). Then turn the steam release knob to the Venting position to release the remaining steam/pressure.
- When the pin in the lid drops back down, open the lid.
- Add the brown sugar, stir well.
- Turn on the sauté setting (normal heat), then stir the beef and sauce. When it starts to simmer, pour in the corn starch slurry. You may not need to use it all. Then turn off the pot.
- Serve immediately over some hot cooked rice.
Nutrition
Nutrition information is automatically calculated, so should only be used as an approximation.
Resources to Make Instant Pot Mongolian Beef
This post contains Affiliate links. As an Amazon Associate I earn from qualifying purchases.
Pin This Recipe


This is one of the best Mongolian Beef recipes! I switched out a yellow onion in place of the green (did’t have any) and added an arrowroot slurry (I’m keto) and added steamed broccoli to the mix. The brown sugar was a game changer (I used brown monkfruit) This was delish! TY!!
Simply amazing! Thank you so much for such a great recipe!
So proud of how this turned out. Used Wagyu skirt and it cut with a fork. Will add this to my “go to” list.
This looks delicious, but I’m going to try it with chicken and leave out the green onion. I bet that sauce is yummy. We don’t eat a lot of red meat so hopefully it’s good.
Hi, just keep in mind that chicken will need less cook time. Boneless thighs would be really great in this recipe!
My husband is diabetic, can you recommend any way to avoid adding (or reducing) the sugar? I can’t imagine a sugar substitute would work well, but maybe 1 tablespoon of molasses instead?
Maybe sweeten after cooking to taste, with Swerve or something like that?
since it is added after most cooking, I would probably use the low sugar/sugar substitute brown sugar and add a little less than recipe calls for.
This recipe is amazing. I only had rice vinegar and decreased the cayenne to 1/8 tsp, and it came out so delicious. I also added some steamed broccoli to the pot at the very end because I wanted some veggie with my dinner. I can’t believe the depth of flavor. I also topped with sesame seeds. I wondered if it would be too sweet, but it’s not. It’s just right. Now I can’t wait to eat the leftovers tomorrow, but I think I’ll have to fight my husband for them.